Introduction to programming with JavaScript tutorial
Published May 5, 2019, 3:37 p.m.
Hello and welcome to a JavaScript basics tutorial series. In this series I am not gonna just do a bunch of toy examples to explain concept after concept, since you'll probably just forget most of them anyway and have to re-look it up again. Instead, we're going to just work towards the completion of a project, in this case, that will be a sort of javascript game in the browser.
By the time you're done with this series, you should be familiar enough with JavaScript to then search google for answers and be able to modify and adapt the answers you see to whatever you happen to be working on, since this is the reality of programming. You likely will never find a programmer who followed some tutorials and learned everything they needed to never need to search again. Most programmers have to search for even some of the more basic concepts, if they arent ones that they use frequently.
My goal here is to give you a working knowledge of JavaScript so you can get out there on your own and conquer!
This tutorial is for anyone who is just starting out in programming and/or javascript. If you feel like we're moving too fast, don't gloss over the things you don't understand! Don't be afraid to search for your questions via online search or in our programming discord channel.
Why JavaScript? Well chances are, if you're here, you already decided you wanted to learn it, but much of my audience is for Python. Javascript is the language of the internet and, while Python does a lot, Javascript does things Python either can't do, or doesn't do well. While JavaScript is mainly used for websites, you can also make desktop applications and d server-side coding.
For this tutorial, we'll be focused on the website-side of things, building code to run in the browser.
Finally, I am kind of a JavaScript noob myself. I've been a professional JavaScript copy and paster for many years, but I am looking to learn more, which is part of why I am producing this series.
I'm likely to say or do outdated things, wrong things, give the wrong name for a thing, and so on. You're going to be learning with me, not necessarily just from me. If you have a better way to do something, or you think I did something wrong, comment on the videos. Even if not, check the comments on the videos if you would like, because someone might have pointe out something useful there and it might be worth a look and a laugh.
Alright lets get building!
To write and use JavaScript, you will need two things:
- A browser...you probably already have one of these!
- An editor. I will use Sublime Text
We're going to write our JavaScript inside of a basic HTML document. If you do not yet know HTML/CSS, you might want to quickly learn the basics there. It shouldn't take more than 30 minutes to an hour to get the idea, it's basically just tags. I'll explain the HTML and CSS to some degree here, but I am not doing an HTML/CSS tutorial, so if you're finding yourself lost, you know the deal...search or ask us in Discord!
So let's create a new file, and call it:
jstutorial.html
Inside of this, we can begin our blank HTML document. An HTML document is made up of tags...of stuff. To start, we will have HTML tags themselves, like this:
<html>

</html>
The bits where you just have the tag, that's usually referred to as an opening tag, then you have the tag that leads with a forward slash. That tells you it's a closing tag.
Inside of HTML tags, you might have meta tags, head tags, body tags, div tags, and who knows what else. For now, we're going to just work with some body tags:
<html>
    <body>

    </body>
</html>
Finally, inside these body tags, we're going to have some script tags:
<html>
    <body>
        <script>

        </script>
    </body>
</html>
These script tags are where our JavaScript is going to go. Well, it's time for us to write some JavaScript! One of the most basic, yet powerful, things we can do with JavaScript is have it produce content to display on our page. We can easily do this with:
document.write()
In the above case, document is a reference to an object, this document. This is the reference to the HTML "document" that is displayed in the browser. Objects have what are called "instances." Each user on your website is going to have their own, unique, "instance," and we reference this programmically with document.
Next, objects all have what are called methods. These are things the objects "do." Objects also have properties.
You can think about this with a metaphor to a dog. A dog object might have properties like: dog.hair = "long"; or dog.tail = True;
A dog object might also have methods like dog.fetch(), where the .fetch() bit runs and the dog runs after a ball and returns to the human object who threw it.
Back to our example, document is the browser page basically, and .write() is a method that will write what we write to the actual page when viewed in a browser.
Let's try it!
<html>
    <body>
        <script>
            document.write("Hello Universe!");
        </script>
    </body>
</html>
Notice the line ends with a semi-colon. All "statements" in javascript (basically every line) needs to be terminated with a semi-colon.
Ok, now what?!
Well, you can just open jstutorial.html in a browser (right click, open in browser). Alternatively, if you're using something like Sublime-Text (or any real editor), you will likely have some way to just "run in browser" your code. For Sublime-Text, you will need to install the package manager. If you've never done that, you need to
- Enable Package control (Tools > enable package control)
- Ctrl+shift+p
- Type install, pick "Package control: Install Package"
- Type in "View in Browser"
- Select and install that.
- Restart Sublime Text
- Control+alt+v will now open in a browser. You can change this by doing ctrl+shift+p, typing key bindings, selecting that, then, in the keymap for user you can put something like
{"keys": ["ctrl+shift+x"], "command": "view_in_browser"},
By default this plugin uses Firefox. If you do not have Firefox, you can either get that, or change the key bind (step 7 above) to be:
{ "keys": [ "ctrl+shift+t" ], "command": "view_in_browser", "args": { "browser": "chrome" } }
Your options where "chrome" is are: safari, iexplore, chrome or firefox
Running this, you should see that indeed your browser shows:
Hello Universe!
We can pass actual HTML here as well, so let's make the "Hello" bold:
<html>
    <body>
        <script>
            document.write("<strong>Hello</strong> Universe!");
        </script>
    </body>
</html>
This should produce:
Hello Universe
What we're passing in those paranthesis is a "parameter." In this case, we're passing just one parameter. The parameter we're passing is "<strong>Hello</strong> Universe!", and this parameter has a datatype, called a "string." Think of strings as text. These are things encased in quotations, which help JavaScript to understand "oh, this is a string!"
Other datatypes include integers (whole numbers) and floats (numbers with decimals).
Okay great, you've already written your first JavaScript program, congratulations! Next, we want to actually make something slightly more exciting, which is going to be a blob-type game, which will allow us to cover pretty much everything we need to know for the JavaScript basics. For this, we need to learn about accessing HTML elements, as well as more specifically, the canvas, which we can draw on.
Most of the time, rather than writing to the page, we use JavaScript to modify or update existing HTML. Let's see some examples. Let's say we have some sort of input field:
<html>
    <body>

      <input type="text" name="example">

    </body>
</html>
In this case, we have an HTML element that takes input inside of it. This "input" is the "value" of the input. We can use JavaScript to modify this, by giving the element a specific id for the JavaScript to look for. For example:
<html>
    <body>

      <input id="modMe" type="text" name="example">

        <script>
          document.getElementById("modMe").value=25;
        </script>

    </body>
</html>
Running this, you should get:
![]()
Another example we can use is with something like paragraph tags:
<html>
    <body>

      <p id=modMe>Starting text</p>

        <script>
          document.getElementById("modMe").innerHTML="A new set of text!";
        </script>

    </body>
</html>
With that, you should see that we can use .innerHTML to modify the actually HTML from within a tag, which was the paragraph tags in this case. When you load the page, you will see the "A new set of text!" rather than "Starting text," because it was updated by the javascript. Next, let's play with the HTML canvas. We can add a canvas to our page with:
<html>
    <body>
        <canvas id="myCanvas" width=200px height=200px style="border:1px solid #000000;"></canvas>
    </body>
</html>
This should give you a blank canvas:
As you might imagine...we can modify this! Different objects have different attributes and properties that we can work with. Canvas' are pretty unique, as we can draw things to them. So let's check that out.
<html>
    <body>

        <canvas id="myCanvas" width=200px height=200px style="border:1px solid #000000;"></canvas>

        <script>
            const canvas = document.getElementById('myCanvas');
            const context = canvas.getContext('2d');
        </script>
    </body>
</html>
First we get our canvas instance, and then we make a variable for the canvas' context instance.
A variable is used to store an object like a value or something like an instance like our canvas instance. In the past, we just had a var for this. As of ES6, we have var, let, and const. Var remains for backwards compatibility, but remains ambiguous, and probably should be avoided for new code.
We use const for a constant. We declare a constant when we don't intend for it to change. So, in our case, we set const canvas = document.getElementById('myCanvas'); because we want canvas to always point to this. We aren't needing canvas later to be able to be 25, or anything other than what it is now. This doesn't mean the thing canvas equals can't change. Our canvas and context objects might actually change. What can't change is what canvas or context refers to.
If we did need the ability to have canvas or context point to some other value entirely, we'd replace const with let.
We use variables and constants to stop a lot of repetition. We might need to reference a number a bunch of times in a script, so we might set it once to a variable, then reference that variable a bunch.
In this case, we're really using a variable to keep our lines somewhat short and so we don't have to type out a super long line a bunch and make our code cluttered/hard to read.
We're going to reference our context quite a bit here, and it's far more clean to just reference context than to do something like...document.getElementById('myCanvas').getContext('2d') every time we want to just reference this context!
Okay, so what's context? Think of this context as the "contents" of our canvas. As we draw things on this canvas, the context keeps a sort of memory of this.
Next, to draw, we start a path, define that path, then actually draw that path. Here's an example:
<html>
    <body>

        <canvas id="myCanvas" width=200px height=200px style="border:1px solid #000000;"></canvas>

        <script>
            const canvas = document.getElementById('myCanvas');
            const context = canvas.getContext('2d');
            context.beginPath();
            context.moveTo(10,10);
            context.lineTo(50,25);
            context.stroke();
        </script>
    </body>
</html>
So we "start" a path with context.beginPath(). This is used to start, or restart, some drawing. We've picked up our pencil, and we're awaiting some instructions! Next we do context.moveTo(10,10), so we've moved our pencil to that point, but we've not marked anything, staying just above the paper. Now we do context.lineTo(50,25). You might think you've drawn a line by now. But oh no. You've just moved your eyes to 50,25. Now, to move your pencel to this point you're looking at...you do context.stroke(). With this, you can run it and see:
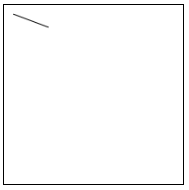
Whoa, we're artists! It's brilliant. It's contemporary. Love it.
A true artist is never actually done with their work, however! In the next tutorial, we're going to continue with working with our canvas here as well as our understanding of JavaScript.
-
Introduction to programming with JavaScript tutorial
(currently viewing) -
Functions and more Canvas - JavaScript Basics Part 2
-
Running functions on an Interval with setInterval - JavaScript basics Tutorial Part 3
-
Conditionals - JavaScript basics Tutorial Part 4
-
Object Oriented Programming in js - JavaScript Basics Part 5
-
Looping with Objects and OOP with JS - JavaScript Basics Part 6