Functions and more Canvas - JavaScript Basics Part 2
Published May 7, 2019, 11:04 p.m.
Welcome to part 2 of the JavaScript basics tutorials. In this tutorial, we're going to continue working with the canvas as well as learning how to use functions.
Code up to this point:
<html>
    <body>

        <canvas id="myCanvas" width=200px height=200px style="border:1px solid #000000;"></canvas>

        <script>
            const canvas = document.getElementById('myCanvas');
            const context = canvas.getContext('2d');
            context.beginPath();
            context.moveTo(10,10);
            context.lineTo(50,25);
            context.stroke();
        </script>
    </body>
</html>
We can add:
            context.lineTo(50,75);
            context.stroke();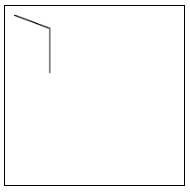
My gosh, it's taken on a totally new form! Incredible.
Everyone, settle down. We're supposed to be making a blob game here. So a blob is really just a circle. Aside from lines, the we can draw arcs with certain radii to specific degrees, in an either clockwise (default) or counterclockwise direction. Sounds like a dream to me. Let's make an arc.
            context.arc(100,100,25,0,1*Math.PI);
            context.stroke();
So this arc is centered at 100,100, with a radius of 25, with a starting angle of 0 degrees, and a final point of 1*Math.PI ...which is half of a circle. Our result:
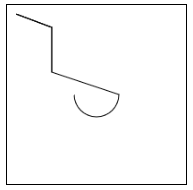
Notice how it looks like we have 3 lines. Why's that? We never re-began our line, so our pencil stayed down and dragged to the starting point for this arc.
Also, notice Math.PI. What's that? JavaScript has lots of built-ins that are there to make your life easier. Things like dates and mathematical operations are right there waiting for you to use them. If you want to learn more about what's available, check out JavaScript's standard built-in objects.
Let's finish this thing! All we really need to do is finish the arc, so rather than 1*Math.PI, let's change it to 2*Math.PI ...and now we've come full circle!
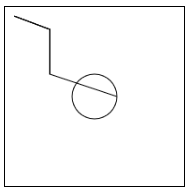
Okay, but we really just want the circle, so let's just do:
<html>
    <body>

        <canvas id="myCanvas" width=200px height=200px style="border:1px solid #000000;"></canvas>

        <script>
            const canvas = document.getElementById('myCanvas');
            const context = canvas.getContext('2d');
            context.beginPath();
            context.arc(100,100,25,0,2*Math.PI);
            context.stroke();
        </script>

    </body>
</html>
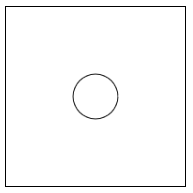
If you've got a context, you can also "fill" in it, which works well for things like circles... let's try!
<html>
    <body>

        <canvas id="myCanvas" width=200px height=200px style="border:1px solid #000000;"></canvas>

        <script>
            const canvas = document.getElementById('myCanvas');
            const context = canvas.getContext('2d');
            context.beginPath();
            context.arc(100,100,25,0,2*Math.PI);
            context.fill();
            context.stroke();
        </script>

    </body>
</html>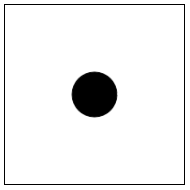
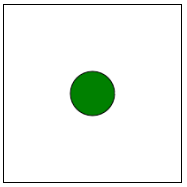
Finally, we can add some color with:
<html>
    <body>

        <canvas id="myCanvas" width=200px height=200px style="border:1px solid #000000;"></canvas>

        <script>
            const canvas = document.getElementById('myCanvas');
            const context = canvas.getContext('2d');
            context.beginPath();
            context.arc(100,100,25,0,2*Math.PI);
            context.fillStyle = "green";
            context.fill();
            context.stroke();
        </script>

    </body>
</html>
Alright, now that we've spent entirely too long playing with the canvas (but seriously, it's very cool), let's continue along with our attempt at some sort of blob game. In order to do this decently, we're going to need... functions!
In programming, there's a concept called "Don't Repeat Yourself," or DRY for short. The idea is that you want to avoid needing to repeat a "thing." This thing might be a specific value, so we use variables to set this value once and then reference the variable, but this "thing" we repeat can also be a "block" (multiple lines) of code. When we have repetion of a block of code, often a function is the thing that can help us.
In our case, imagine we wanted, say, 5 blobs. How might we do that? Without functions, we'd just copy and paste our blob code and then manually edit some of the variables for the blob location and maybe size. What we really should be doing though is making functions. Code up to this point:
<html>
    <body>

        <canvas id="myCanvas" width=200px height=200px style="border:1px solid #000000;"></canvas>

        <script>
            const canvas = document.getElementById('myCanvas');
            const context = canvas.getContext('2d');
            context.beginPath();
            context.arc(100,100,25,0,2*Math.PI);
            context.fillStyle = "green";
            context.fill();
            context.stroke();
        </script>

    </body>
</html>
For our blob function, we'd like to probably like to be able to dictate position (x, y), size, and color.
So how do we do this? We can begin defining a function like:
            function blob(x, y, size, color){

            }
The name of our function is blob. The blob function takes in 4 parameters: x, y, size, and color. The code that belongs to this function is encased inside these curly braces. Anything inside of these curly braces is "local" to our function. Variables we define inside here, for example, are called "local variables."
Now, we just need to replace our circle-drawing code's position, size, and color values with these parameters, so our function is now:
            function blob(x, y, size, color){
              context.beginPath();
              context.arc(x, y,size,0,2*Math.PI);
              context.fillStyle = color;
              context.fill();
              context.stroke();
            }
Now, if we just run this, nothing happens. This is because we've merely defined a function. We're not calling it. An example of calling it might be:
blob(100,100,25,"green");Full code:
<html>
    <body>

        <canvas id="myCanvas" width=200px height=200px style="border:1px solid #000000;"></canvas>

        <script>
            const canvas = document.getElementById('myCanvas');
            const context = canvas.getContext('2d');

            function blob(x, y, size, color){
              context.beginPath();
              context.arc(x, y,size,0,2*Math.PI);
              context.fillStyle = color;
              context.fill();
              context.stroke();
            }

            blob(100,100,25,"green");
        </script>
    </body>
</html>
Now, adding a few more blobs is just one line per blob away!
            blob(100,100,25,"green");
            blob(25,75,12,"red");
            blob(60,22,18,"blue");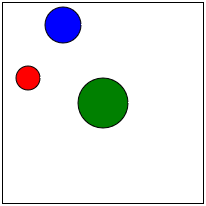
-
Introduction to programming with JavaScript tutorial
-
Functions and more Canvas - JavaScript Basics Part 2
(currently viewing) -
Running functions on an Interval with setInterval - JavaScript basics Tutorial Part 3
-
Conditionals - JavaScript basics Tutorial Part 4
-
Object Oriented Programming in js - JavaScript Basics Part 5
-
Looping with Objects and OOP with JS - JavaScript Basics Part 6